Introduction:
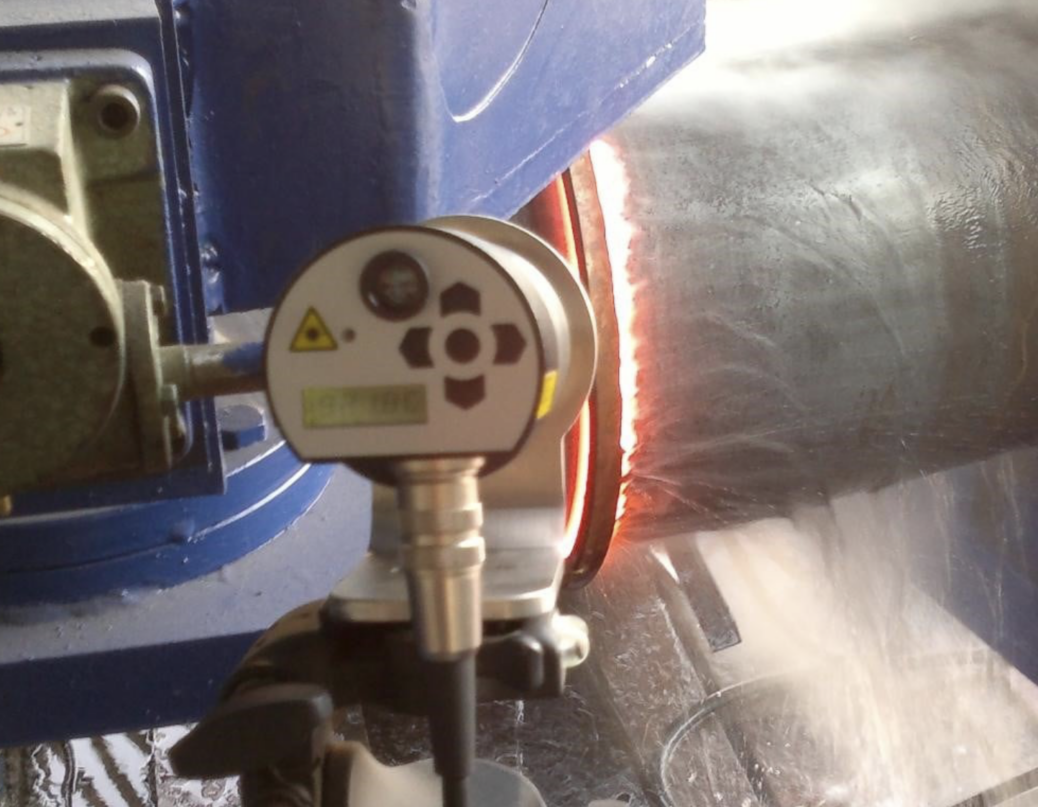
Induction bending is a hot working process that can be applied to metal profiles and pipes. In the process, metallurgical and dimensional factors are significant parameters that must be under control. Induction bending is done on a special bending machine. The temperature is provided by the magnetic current flowing through the induction coil with the power provider. The bending is done by heating a small section of the pipe with this induction coil. After reaching the desired temperature, this section is cooled rapidly by water sprays in the induction coil. The bending direction and angle can be adjusted especially on the machine and the hydraulic system pushes the pipe or profile at the desired angle. Depending on the type of steel, an additional heat treatment may be applied after bending.
ASTM A106 grade pipe is a low-carbon steel pipe and used for high temperature applications. It is usually used in industrial plants, power plants, refineries and chemical plants. In addition, for the reason of strength values conservation it is came into use in architectural projects. A106 grade pipe is a seamless pipe and there are three types: gr A, gr B and gr C. Among these, the most commonly used type is gr B.
In this article, ASTM A106 Gr:B quality seamless pipe is used to compare the mechanical and metallurgical properties between straight pipe, bending by induction bending, and normalization heat treatment after bending. Analyzes applied to samples; tensile test, hardness test, and ASTM grain size analysis.
Process:
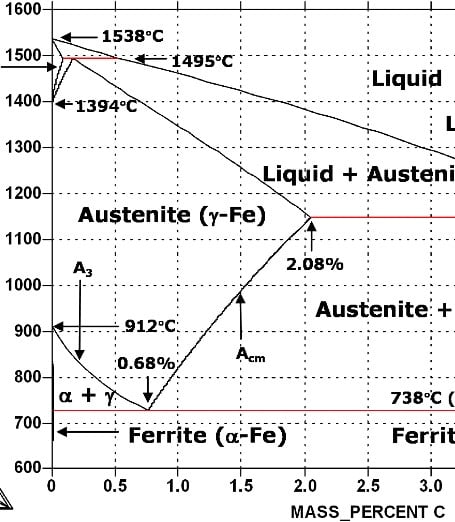
Steel pipe bending is carried out in the austenitizing zone by going over the A3 line in Fe-C phase diagram. After this temperature is reached, rapid cooling is applied from the sprays while bending.
The different sections of the pipe during induction bending are shown in Figure 2. In the process, the inner part of the pipe called intrados is subjected to compression and the outer part called extrados is subjected to tension. As a result, intrados wall thickness may increase and extrados wall thickness may decrease. These thickness changes are distributed homogeneously throughout the entire heated zone. As a general assumption, these changes must not change more than 25% of the initial value.
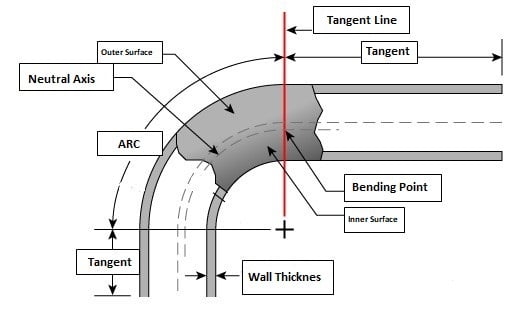
Figure 2. Different sections of the pipe in induction bending process
The chemical composition of ASTM A106 Gr:B grade pipe is shown in Table 1. 9,5 mm wall thickness pipe used in the process. According to the composition of this pipe, the bending temperature determined by taking line into consideration is 920-930°C. At this temperature, the pipe is bent at an angle of 90 degrees.
Table 1. Chemical Composition of ASTM A106 Gr:B Grade Pipe
| C % | Mn % | Si % | P % | S % | Cr % | Ni % | Cu % | Mo % |
| 0,17 | 0,95 | 0,23 | 0,009 | 0,006 | 0,11 | 0,09 | 0,16 | 0,04 |
Heat Treatment After Bending:
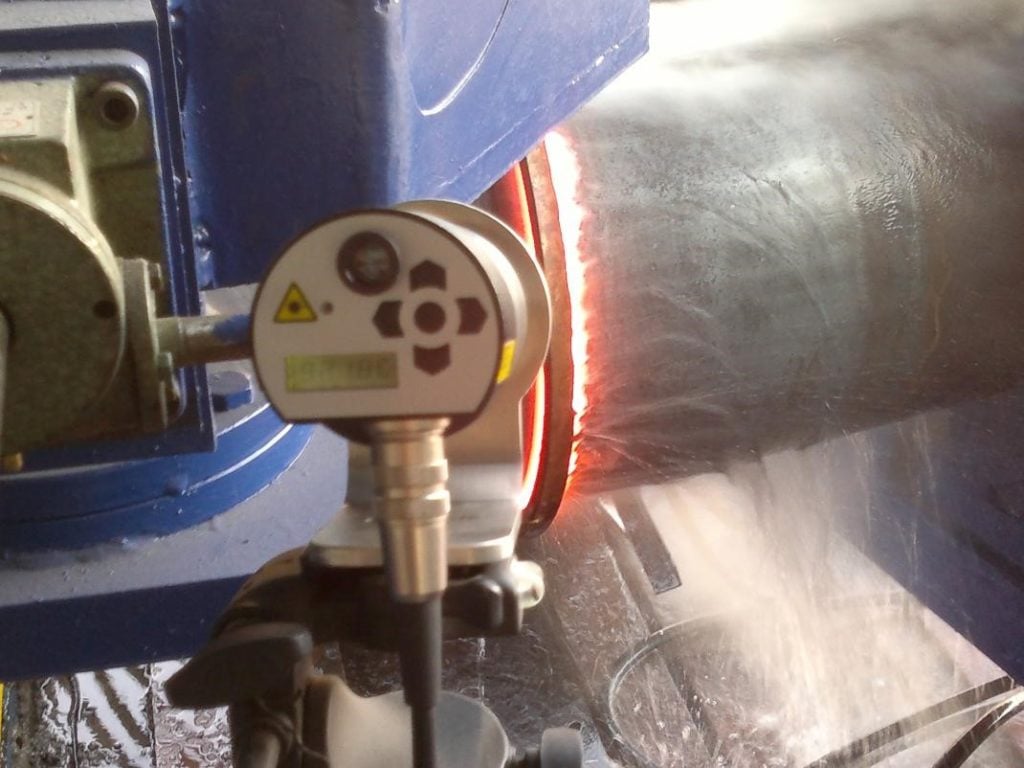
Figure 3. Temperature Measurement in Pipe Bending
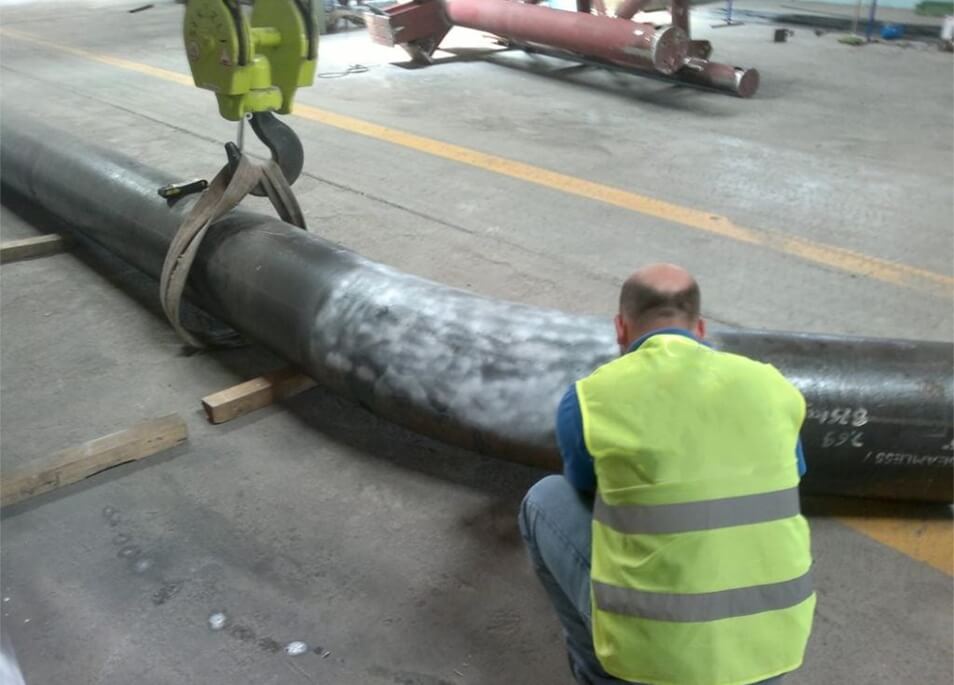
Figure 4. Bended ASTM A106 Pipe
Heat Treatment After Bending:
Depending on the grade of the bended steel, the carbon content, the application area, heat treatment after bending may be required. These treatments are annealing, normalization or stress-relieving heat treatment. While the pipes which will work under high temperature and pressure are subjected to additional heat treatment when necessary, steels used in structural steel applications generally do not require heat treatment after bending. In this study, ASTM A 106 Gr:B pipe used in high temperature applications was subjected to normalization after hot working to compare mechanical and metallurgical properties. The samples which were cut for normalization were kept in closed kiln at 920°C for 20 minutes. In normalization, the heating rate was determined as 220°C/hour.
Tests:
1.Measurement of wall thickness changes
2.Tensile Test
3.Hardness Test
4.ASTM Grain Size Analysis
Measurement of wall thickness changes:
After bending process wall thickness measurements were made on both the inner surface and the outer surface of the pipe. The pipe initially having a wall thickness of 9,5 mm, after bending process the inner surface (intrados) was measured as 10,7 mm and the outer surface (extrados) was 8 mm. According to this measurements, inner wall thickness change was 12%; outer wall thickness change was 15%. In this case, the values are within the 25% acceptance criteria.
Tensile Test:
After bending process to 2 different ASTM A106 gr:B grade pipes, samples taken from 2 different pipes were subjected to tensile test. The values obtained as a result of the tensile tests applied to the samples taken from the first pipe are shown in Figure 5, and the second pipe are shown in Figure 6. After the bending, samples taken from both intrados and extrados of the pipe. As seen on the graph, the strength after bending increases to high values due to the rapid cooling, but at the same time the percentage elongation values of the pipe are reduced compared to the original state. The percentage elongation values of the samples taken from both pipes are also shown in Table 2.
With the normalization heat treatment applied after bending process, yield and tensile strengths returned to their original values and percentage elongation values were returned to values close to the original state. In addition, the strength differences in the extrados and intrados of the pipe decreased after normalization and more homogeneous structure was obtained at the end of the process.
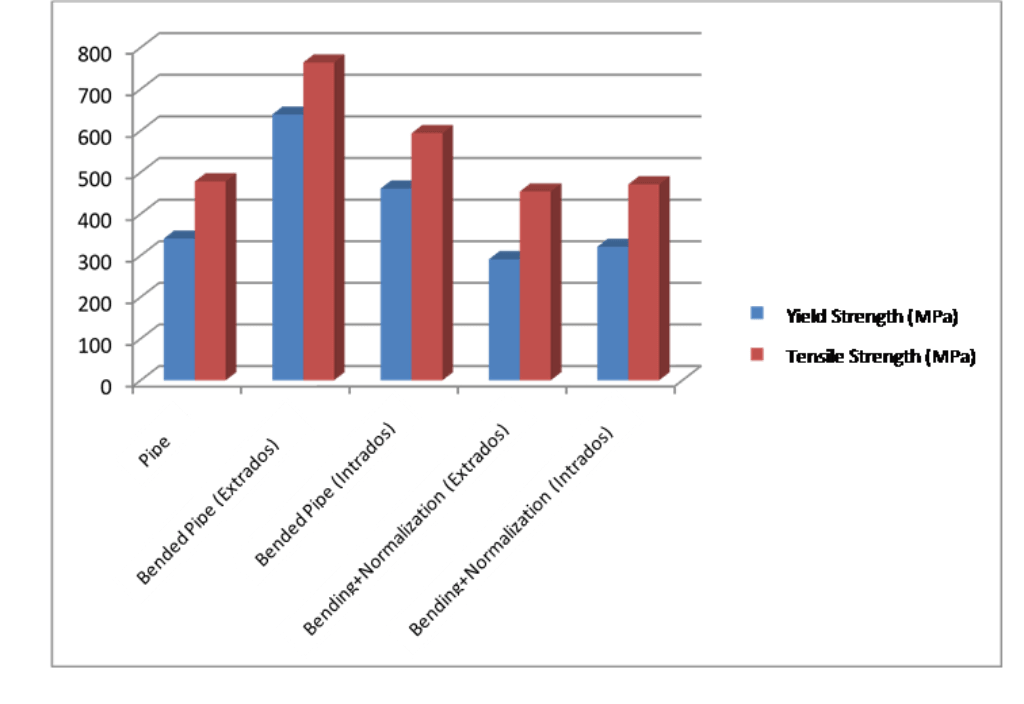
Figure 5. Yield and tensile strength of samples taken from Pipe 1
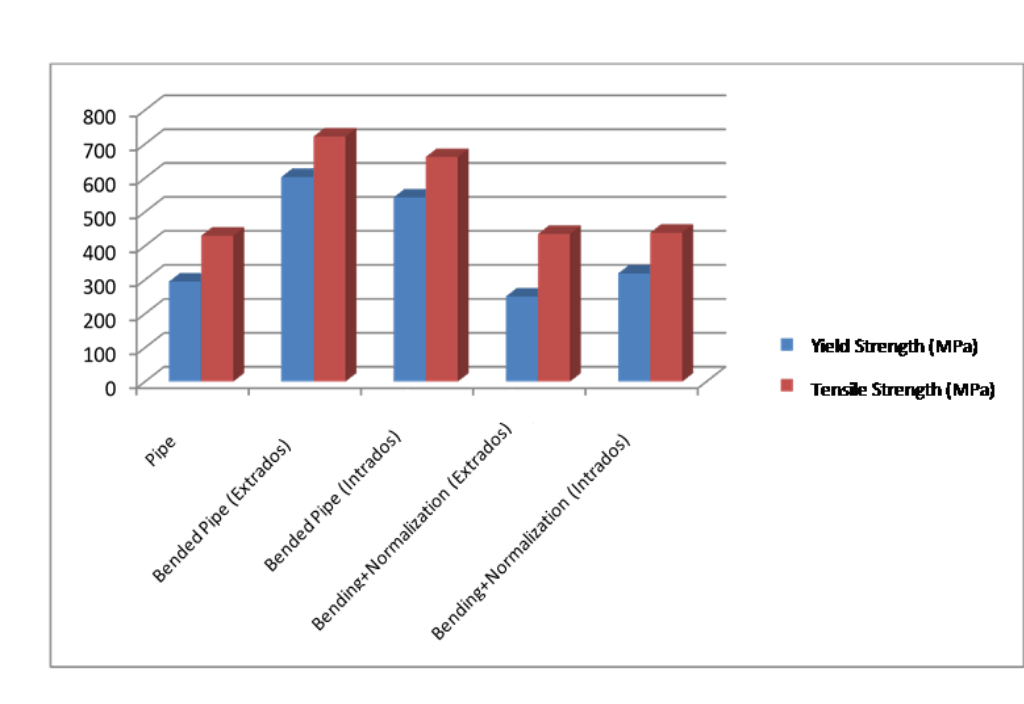
Figure 6. Yield and tensile strength of samples taken from Pipe 2
Table 2: Percentage Elongation Values of Both Pipe Samples
| Material/Process | Pipe Form | Bending Extrados | Bending Intrados | Bending+Normalization (Extrados) | Bending+Normalization (Intrados) |
| Pipe 1 | 43,89% | 29,63% | 28,72% | 43,22% | 44,63% |
| Pipe 2 | 45% | 20,86% | 37,73% | 44,60% | 51,78% |
Hardness Test:
After induction bending, it is usually desired that the HV hardness values of the bended pipes do not exceed 250-300 HV. In this study, as in other tests, hardness test were applied to the straight state of the pipe, hot bended state, and finally to the normalized state after bending. The hardness test sections of the bended pipe are shown in Figure 7. The hardness values of the measurements taken from these sections can be seen in Table 3. Hardness measurements of normalized samples after bending are shown in Table 4. Although the hardness values are decreased after normalization, the values are below the acceptance limit of 250-300 HV for both non-heat treated and heat treated samples.
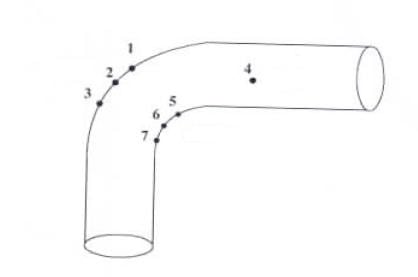
Figure 7. Hardness measurement sections of the bended pipe
Table 3. Harndnes values of non-heat treated bended pipes
| Hardness measurement section | Heat Treatment Status | Measured Average Harndess |
| 1 | Non-heat treated state | 205 HV |
| 2 | Non-heat treated state | 180 HV |
| 3 | Non-heat treated state | 235 HV |
| 4 | Non-heat treated state | 134 HV |
| 5 | Non-heat treated state | 181 HV |
| 6 | Non-heat treated state | 155 HV |
| 7 | Non-heat treated state | 155 HV |
Table 4. Hardness values of normalized pipes after bending
| Hardness measurement section | Heat Treatment Status | Measured Average Harndess |
| 1 | Normalized | 150 HV |
| 2 | Normalized | 154 HV |
| 3 | Normalized | 132 HV |
| 4 | Normalized | 133 HV |
| 5 | Normalized | 132 HV |
| 6 | Normalized | 138 HV |
| 7 | Normalized | 134 HV |
In the following graph, the hardness comparison for the 3 states of the pipe can be seen by taking the average of these measured values.
Microstructure Analysis:
After bending process, microstructure analysis was applied on various samples taken from different regions of 2 different pipes and ASTM grain size numbers were determined according to ASTM E112 standard. In the microscope analysis, 2% NITAL was used as etching reagent after grinding and polishing. Then, ASTM grain size numbers of samples were calculated with 100x magnification.
As can be seen in Table 5, as a result of the analyzes applied to the samples taken from the intrados and extrados sections of the pipe, ASTM grain size numbers were determined in the range of 8,68-9,51. These values indicate that grain diameters vary in the range of 15-21 microns. Considering the grain sizes of the samples which were not applied to heat treatment after bending, normalization heat treatment did not have any significant effect on the grain size of ASTM A106 pipe as well as it was not a metallurgical problem.
Table 5. ASTM grain size numbers of hot bended pipe samples
| Sample Type | ASTM Grain Size Number |
| Non-heat treated bended pipe (extrados) | 9,38 |
| Non-heat treated bended pipe (intrados) | 8,68 |
| Normalized bended pipe (extrados) | 9,51 |
| Normalized bended pipe (intrados) | 9,22 |
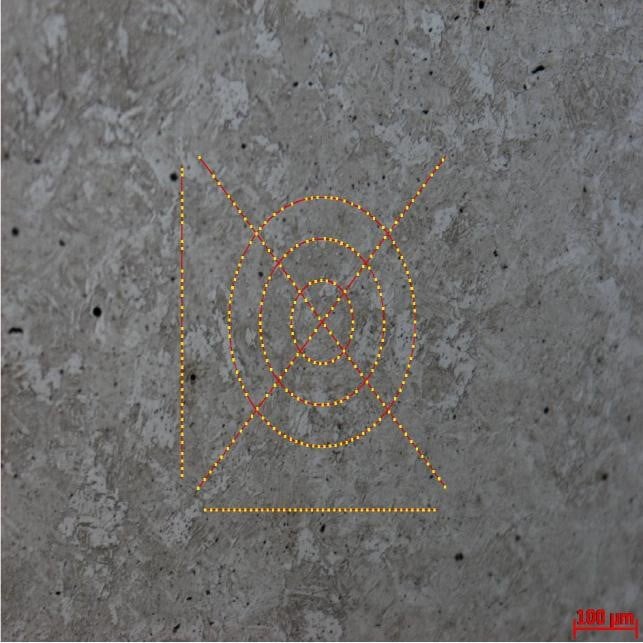
Figure 9. Microstructure of the non-heat treated sample after bending (extrados)
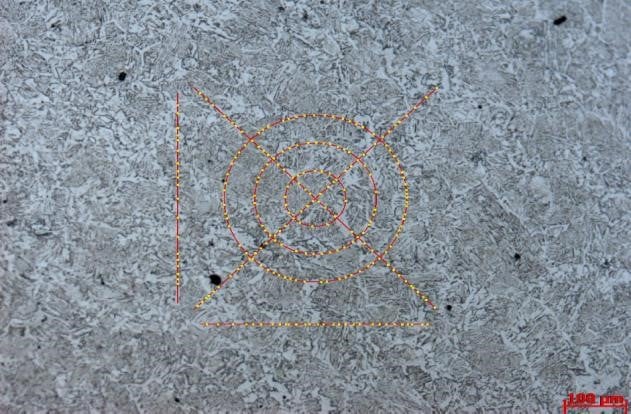
Figure 10. Microstructure of the non-heat treated sample after bending (intrados)
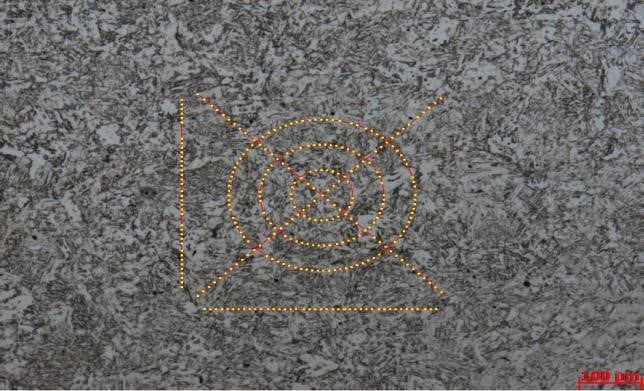
Figure 11. Microstructure of the sample which applied normalization heat treatment after bending (extrados)

Figure 12. Microstructure of the sample which applied normalization heat treatment after (intrados)
Results and Interpretations:
As a result of the bending of ASTM A106 Gr:B pipe by induction bending method, it was observed that the yield and tensile strengths of the pipe increased with the effect of rapid cooling and consequently the percentage elongation values decreased compared to the straight pipe state. This change in mechanical properties is not a problem in structural steel projects, but also provides an advantage by increasing the strength. For the pipes to be used in high temperature applications such as in this study, depending on the type and hardenability of the steel to be used, additional heat treatment may be required after bending. The normalization application for ASTM A106 Gr:B pipe made the pipe more homogenous and brought it closer to its original state. In spite of this positive effect of normalization; analysis such as tensile test, ASTM grain size analysis, hardness test and measurement of changes in wall thickness show that even if no additional heat treatment is applied to the pipe after bending, the values remain within the international acceptance limits.
Why Hot Bending?
As mentioned at the outset, the induction bending method, which is a hot bending method, has many advantages over alternatives. Compared to cold bending, the plastic deformation applied to the material in the cold bending process causes a significant decrease in the ductility and hence toughness of the material due to the fact that it is made during the ferrite phase of steel material, and its use in applications requiring strength is risky. In induction bending, since the steel material bends around 900°C and the austenite phase is much more ductile than the ferrite phase of the steel at these temperatures, it is bended by applying less plastic deformation and hence there is no significant decrease in the toughness of the material. Additionally, due to the diameter and bending angle limitation, pipe bending of any sizes is not possible by cold bending method. Pipes up to 1200 mm in diameter can be bended without any problem by hot bending method.
Hot bending method of pipe has many advantages over welded elbow applications. The temperature in welded manufacturing is above 1532°C, the melting temperature of the steel, and is exposed to thermal cycling in a much wider area than hot bending during cooling. This phenomenon may lead the steel to become brittle, grain growth, hardness increase. In hot bending method, by the reason of reaching such high temperatures and heating only a small part of the pipe thermal cycles carry less risk than welded manufacturing. In terms of hardenability, while welded connections below 350 HV hardness are considered safe by international standards in welded manufacturing, under 250 HV hardness is guaranteed in hot bending method. This allows the steel to become much tougher. The advantages of induction bending over methods such as manual or semi-automatic arc welding are that the method is fully automatic and does not require any dexterity or human factor.
With all these advantages, hot bending method has been preferred in recent years, industrial plants, risky high temperature applications, pipelines, architectural projects involving structural steel.
Authors: Çağatay Ö., Yetkin S., Mithat Z.K.

