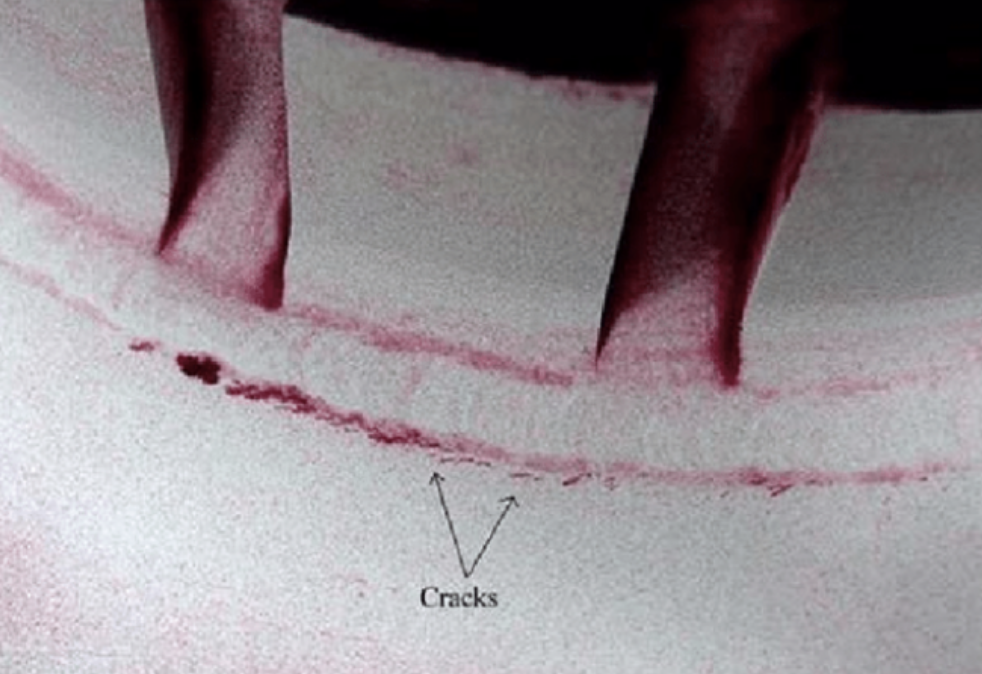
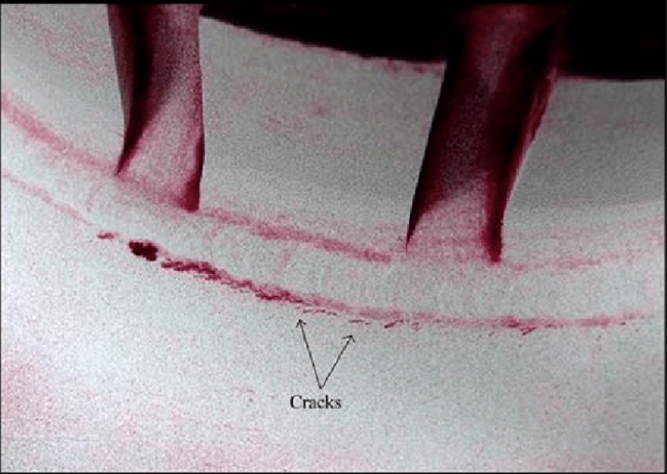
Failure analysis methods vary according to the failure degree of the related material. The failure of the material may cause irreversible damages, and the material becomes nonusable. A good example can be given as fractured shafts, where the damage of the failure generates irreversible results on the material. At this point, destructive test methods are conveniently used to detect the failure mechanism of the material. However, if the damage on the failed component is reversible, then destructive test methods become improper since these methods are based on cutting or drilling of the failed part. In the cases when the failed part can be repaired, non-destructive test methods are preferred. There are several types of non-destructive test methods are existing, but some specific techniques are conveniently used for failure detection. The types of non-destructive test methods can be grouped according to the location of the failure on the material. The below table is done for the classification of the non-destructive test techniques.
Table 1. Classification of Non-destructive Tests
| Methods for Surface Examination | Methods for Volumetric Examination |
| Dye (Liquid) Penetrant Testing | Ultrasonic Testing |
| Magnetic Particle Testing | Radiographic Testing |
| Eddy Current Testing | Electromagnetic testing |
| Visual Examination |
Dye (liquid) Penetrant Testing
The dye penetrant test method is the most common non-destructive testing because of its simplicity and cost-efficiency. Dye penetrant testing has its origins in the 19th century when oil and kerosene mixtures are used for the inspection of the flaws and cracks. The technique is mostly used for the detection of surface and/or near-surface defects. The mechanism of the method is based on the reveal of the colored dye from flaws or cracks. These flaws or cracks are in micro sizes, which cannot be detected by visual inspection techniques. When a liquid penetrant is applied onto a clean surface, penetrant liquid leaks into the cracks with the help of the capillary action. The surface of the examined component is removed from the excess liquid, and developer material is applied. The time duration between the initiation of the process and removal of the excess penetrant is called ‘dwell time.’ The developer matter is applied to ensure the reveal of the leaked penetrant liquid. The advantages of liquid penetrant testing over visual inspection can be stated in two categories.
- Dye penetrant testing enables the detection of micro-flaws in larger sizes. Most of the flaws that are present on the failed material are in small sizes that cannot be detected by naked eyes. (A healthy naked eye can only detect details larger than 0.08 mm)
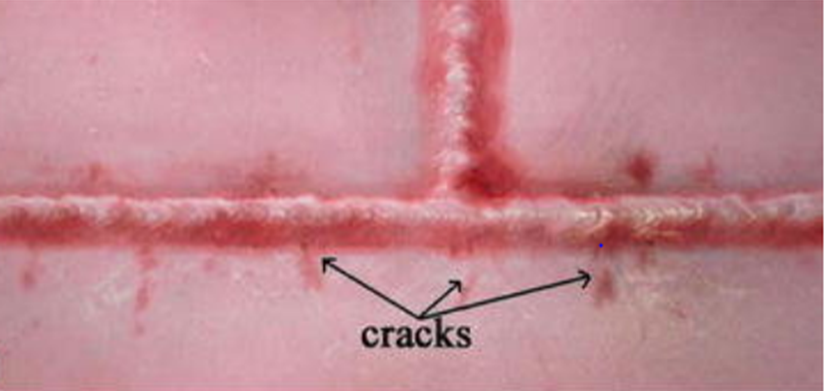
- Dye penetrant test eases the detection of the defects on the surface of the failed material by generating a contrast between the background of the material and the liquid penetrant. (For example, a red penetrant can be easily detected on a white background. Moreover, fluorescent penetrant materials can be utilized for a better examination since it glows on the surface)
The dye penetrant testing is very convenient for most failure analysis applications since the method is easy to operate. Moreover, this method can be used for a wide range of materials such as; metals, ceramics, rubber, and glass materials. One constraint of the process can be mentioned as the specific location of the defects on the material. One must consider that the flaw or crack on the material must intersect the surface since the application of the liquid penetrant is only available from the surface of the material.
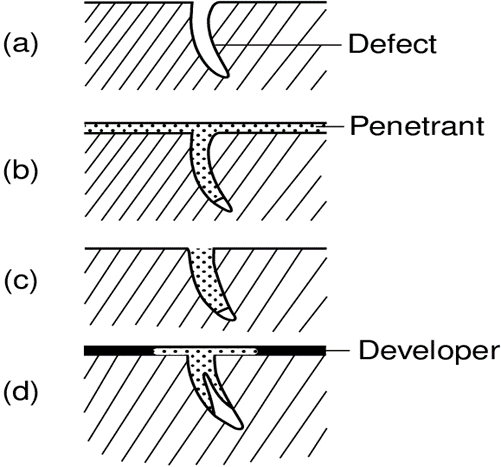
The steps and the utilization of penetrant testing may depend on the failure case. However, a general application scheme for the penetrant test can be explained by certain steps. First of all, the preparation of the surface is vital for the progress and accuracy of the process. The surface of the examined part must be removed from the oil, water, grease, or any other contaminants. These contaminants may inhibit the penetration of the liquid through the flaws. In the cases, if the examined component has a mechanical operation history, the surface must be etched prior to the process. Mechanical operations such as sandblasting, grinding, or machining may leave a trace on the surface. These traces can prevent the penetration of the liquid.
When the materials’ surface is prepared for the penetration, the penetrant liquid is applied onto the surface by spraying, brushing, or immersing into a liquid penetrant bath. After the penetrant application, the liquid material is awaited for proper penetration. This penetrant dwelling process is vital for the appropriate applications. The dwelling time of the penetrant is decided by the producers or specifications. The dwelling time can depend on the type of the penetrant material, the examined material, and the shape of the defect. The standard time duration for dwelling can vary from 5 minutes to 60 minutes. The extent of the dwelling time is not harmful to the inspected material; however, if the penetrant liquid dries in the flaws, the test fails. When the dwelling of the penetrant is ensured, the excess penetrant liquid is removed from the surface of the inspected material. The removal of the penetrant is the most tender step of the process. The excess penetrant must be carefully removed from the surface by considering the penetrant in the flaws. The liquid penetrant must be kept in the defects. The removal of the liquid can be done by using specific solvents. After the removal of the excess penetrant from the surface, the developer step is initiated. The developer is used to draw the penetrant liquid from the flaws through the surface to make it more visible. A thin developer layer is applied through the penetrant where the developer matter, whether in the solid or liquid phase. Common developer materials are used as in powder or spray forms. When the developer is applied to the flaws, a time period must be awaited for the proper development. The time for the development must be at least 10 minutes for most of the applications. The development time may depend on the size of the cracks. When sufficient time is awaited for the development, inspection starts. Inspection is done under proper lights to see all flaws on the inspected component. When the inspection is done, the surface of the material is cleaned.
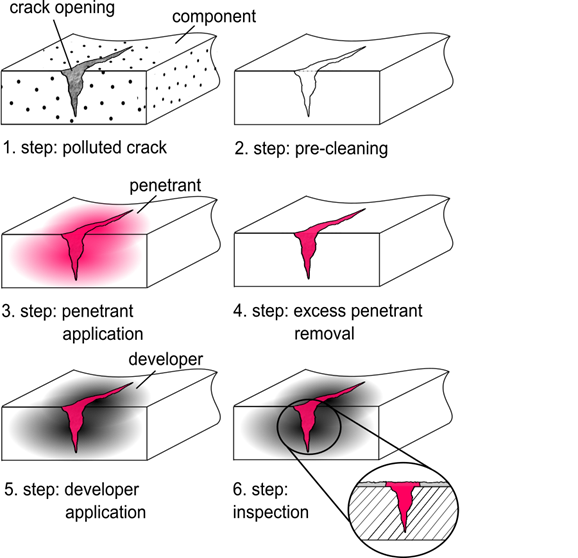
The pros and cons of the dye penetrant testing must be discussed to understand the convenient usage of the method. According to the type of the inspected material, the advantages and disadvantages of the method may vary. However, the standard classification of the benefits and drawbacks of the process is listed below.
Advantages of dye penetrant testing;
- The sensitivity of the method is considerably high. During the inspection, even micro-sized cracks can be detected.
- The range of susceptible materials to the dye penetrant test is substantially wide. Metals, ceramics, polymers, magnetic and non-magnetic materials, or conductive and non-conductive materials, all are proper candidates for the dye penetrant testing
- The inspection duration is relatively fast when compared with the other methods. Large-sized inspection zones or bulky components can be examined in short times.
- The method is free from the shape of the inspected material. Complex shaped materials can be examined as well as the simple shaped materials
- The equipment for dye penetrant testing is not expensive. Hence the method is also desirable for economic aspects
- The equipment of the method is portable.
Disadvantages of Dye Penetrant Testing
- The dye penetrant method can only investigate surface or near-surface defects
- The porosity of the inspected material is essential for the accuracy of the test. Materials with high porosity cannot be examined by using the liquid penetrant method
- The utilization of the method requires surface pre-cleaning. Contaminations on the surface may hinder the proper results
- Machining traces on the inspected surface must be cleaned, and the surface must be etched
The quality and type of penetrant are crucial for the dye penetrant method. Selected penetrant material must have enough sensitivity for small flaws or cracks. Some essential features of the penetrants can be listed as below;
- The penetrant material must be drawn by the capillary actions through the surface defects.
- The penetrant must remain in the flaw consistently till the developer is applied
- The selected penetrant liquid must be safe for the inspected material. Chemical attacks or other harmful effects of the penetrant liquid may cause damages to the material
- The visibility of the penetrant liquid must be enough for inspection. Proper colored penetrants must be selected according to the background.
- The penetrant liquid must cover the inspected surface to ensure a total inspection without any missing defects on the materials surface
Read More: Non-Destructive Test Methods 2
References
- Liquid Penetrant Testing. (2021). Retrieved 10 January 2021, from http://www.ndttechnologies.com/products/penetrant_testing.html
- Kauppinen, P., & Sillanpää, J. (1993). Reliability of surface inspection techniques. International Journal of Pressure Vessels and Piping, 54(3), 523–533. doi:10.1016/0308-0161(93)90020-t
- Mandache, C., Levesque, D., Dubourg, L., & Gougeon, P. (2012). Non-destructive detection of lack of penetration defects in friction stir welds. Science and Technology of Welding and Joining, 17(4), 295–303. doi:10.1179/1362171812y.0000000007
- Migoun, N. P., & Delenkovskii, N. V. (2009). Improvement of penetrant-testing methods. Journal of Engineering Physics and Thermophysics, 82(4), 734–742. doi:10.1007/s10891-009-0253-2
- Irek, P., & Słania, J. (2017). Material factors in relation to development time in liquid-penetrant inspection. Part 3. Testing of model plates. Archives of Metallurgy and Materials, 62(1), 41–49. doi:10.1515/amm-2017-0006
- Eric, H. (n.d.). Real-time detection of developing cracks in jet engine rotors. 2000 IEEE Aerospace Conference. Proceedings (Cat. No.00TH8484). doi:10.1109/aero.2000.877893
- Xue, F., Wang, Z.-X., Zhao, W.-S., Zhang, X.-L., Qu, B.-P., & Wei, L. (2014). Fretting fatigue crack analysis of the turbine blade from nuclear power plant. Engineering Failure Analysis, 44, 299–305. doi:10.1016/j.engfailanal.2014.05.006
- Endramawan, T., & Sifa, A. (2018). Non Destructive Test Dye Penetrant and Ultrasonic on Welding SMAW Butt Joint with Acceptance Criteria ASME Standard. IOP Conference Series: Materials Science and Engineering, 306, 012122. doi:10.1088/1757-899x/306/1/012122

