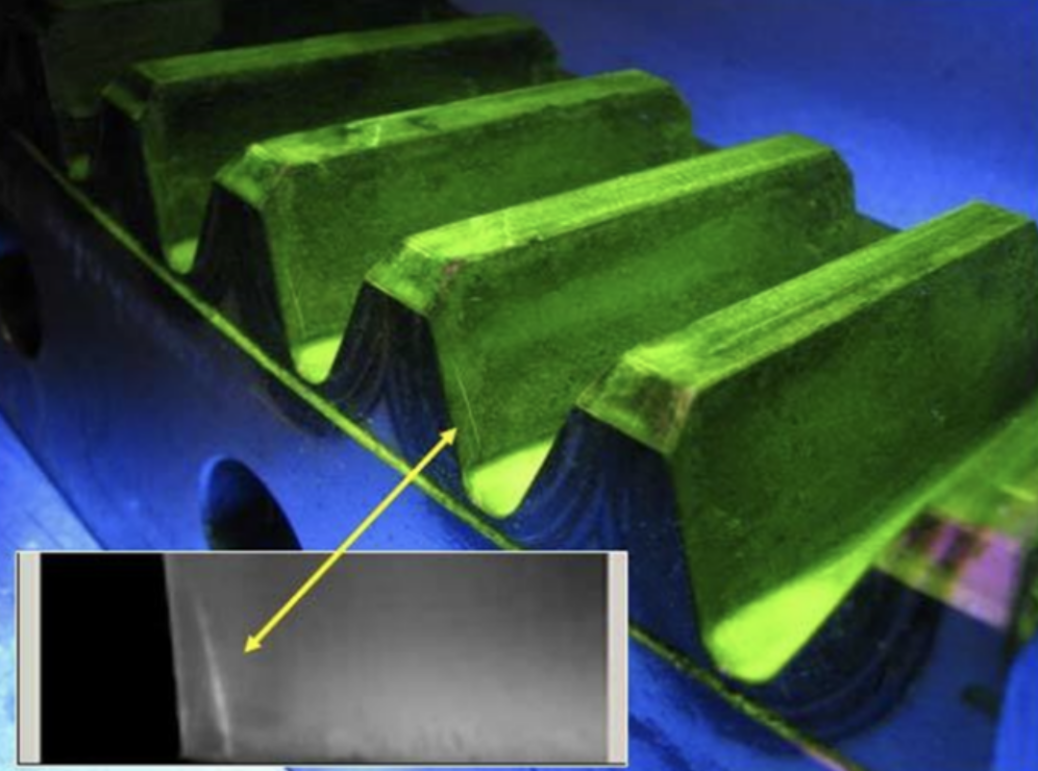
Inspection of the damaged components can be defined as a sensitive process. Hence, non-destructive testing methods are mostly desired for the cases where parts can be repaired after finalizing the inspection. Non-destructive test methods are several in numbers just because of the various requirements of various components. Thus, one must well understand the advantages of each non-destructive inspection method for an accurate examination. As well as the dye penetrant testing, magnetic particle testing is also commonly used for most failure analysis applications. Below content is prepared for further information about magnetic particle testing.
Magnetic Particle Testing (Inspection)
Magnetic particle inspection is another standard method that is used for the detection of discontinuities or defects. Similar to the dye penetrant testing, magnetic particle testing is a very desirable method for the inspectors since the utilization duration of the method is relatively short, and the process is cost-efficient. In the magnetic particle inspection, magnetic fields and magnetic particles are used for examination. However, this method has a crucial constraint. Material that is inspected must be ferromagnetic. Here, ferromagnetic means the materials that can be magnetized. Most of the common metals such as; iron, nickel, and cobalt can be inspected by magnetic particle testing. Steel components can also be inspected using magnetic particle testing. Stainless steels can also be examined by using this method. Nonetheless, austenitic stainless steels are not proper for the magnetic particle inspection since they exhibit paramagnetic behavior. In contrast with the austenitic stainless steels, ferritic and martensitic stainless steels are also suitable materials for magnetic particle testing. The magnetic particle inspection method is mostly used for the detection of near-surface defects. A standard range for detection depth of this method is decided as 6 mm for typical applications. The magnetic particle inspection method is used in almost every engineering applications and sectors, such as; automotive, petrochemical, aerospace industries. Magnetic particle inspection is also suitable for underwater applications.
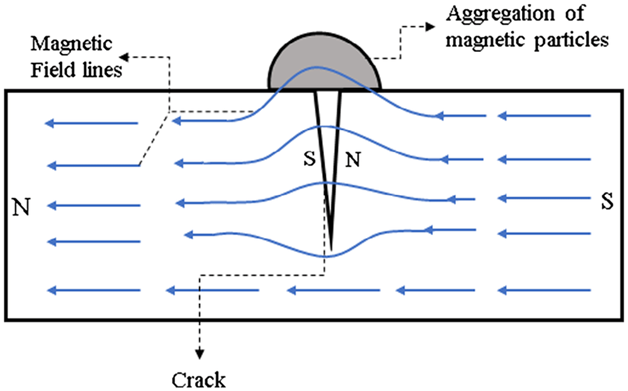
The magnetic inspection method is actually substantially primary, in theory. The principles of the method are based on magnetic laws. In theory, if a ferromagnetic bar is placed into a circular or round wire where current flows, magnetic field lines align on the ferromagnetic bar. The alignment of the magnetic field lines is always vertical to the center of the circular wire. Hence, magnetic fields pass parallel to the bar that is magnetized. If the ferromagnetic workpiece contains any defects, voids, or flows, magnetic fields cannot pass from these discontinuities. The change in the direction of the magnetic fields can be defined as the mechanism of magnetic particle testing. The magnetic field lines spread out from the discontinuities because of the existence of the air in the flaws or cracks. In the case when the magnetic field lines spread out from the cracks, a magnetic flux leakage occurs. Hence, magnetic particles accumulate at the flux leakage zones where defects locate. The accumulation of the magnetic particles acts as an indicator for the inspection. Inspectors can easily detect the location of the defects according to the accumulation of the magnetic particles. However, if the discontinuity locates in the deep areas of the inspected ferromagnetic material, the magnetic flux leakage remains in the material. In this case, an inspection of the flaws becomes impossible since the magnetic leakage flux remains in the body of the inspected material. Therefore, the location of the flaws or cracks in the inspected body is a constraint for the examination. The below schematic represents the magnetic flux leakage. The magnetic fields spread out because of the existence of air where cracks or flaws exist.
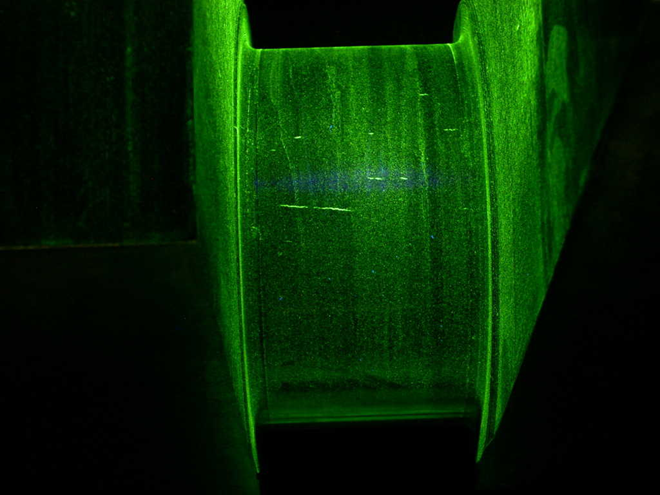
Magnetic inspection can be done by using either dry particles or wet particles. Dry and wet particle inspections both have distinct advantages depending on the type of application. In dry particle inspection, dry magnetic particles are sprinkled onto the material that will be inspected. The dry particle inspection method is most suitable for the material that has rough surfaces. In the dry particle examination, an electromagnetic compound is used for generating magnetic fields on the inspected material. The magnetic field on the material creates the motion of the dry particles. As in the dye penetrant testing, the materials surface must be clean. Nevertheless, the cleanliness of the surface does not affect the accuracy of the test when compared with the liquid penetrant testing. The general cleaning of the surface is done prior to examination. Contaminations such as oil, dirt, dust, or grease must be removed. The coatings on the workpiece’s surface are acceptable up to some specific thicknesses. The nonconductive coatings (e.g., paint) are permissible up to 0.076 mm, and ferromagnetic layers (e.g., nickel, iron, or cobalt coatings)is acceptable up to 0.025 mm. The oxide scales on the surface must be removed, too. The adequate magnetic field is supplied by using permanent magnets. When the material is magnetized by using the permanent magnets, a thin layer of dry particles is covered onto the surface. When the magnetization force remains on the material, the excess powder must be removed. In the removal step, the air is blown through the surface of the component. If the magnetization of the parts is ensured by using permanent magnets, demagnetization is not required. In contrast with that, if the inspected material is magnetized by using electromagnets, demagnetization is required. In the final, the ınspection can be held by observing the accumulation of the dry particles.
As mentioned above, wet particles can also be utilized for magnetic inspection. A suspension solution is used for the operation. A liquid is used as the media, and the particles are suspended in the liquid media. When compared with the dry particle inspection, the wet particle inspection method has numerous advantages. The surface of the inspected material can be easily and rapidly covered by using wet magnetic particles. In addition to that, the distribution of the particles can be ensured uniformly. Moreover, the detection of the small cracks and flaws can be easily done by using wet particles since the mobility of the wet particles is relatively better than the mobility of the dry particles because of the liquid media. Hence, the best results on smooth surfaces with very small defects can be done by using wet magnetic particles. However, on rough surfaces, the dry particle method is considered the most suitable way for the indication of the defects. The surface preparation step shows similarities with the dry particle inspection method. The pre-cleaning of the surface from the contaminations must be done before the initiation of the test. The contaminators on the surface may hinder the wetting behavior of the surface. As in the dry particle method, layers on the examined material’s surface is acceptable up to some certain thicknesses. The nonconductive coatings (e.g., paint) are acceptable up to 0.076 mm, and ferromagnetic layers (e.g., nickel, iron, or cobalt coatings) are acceptable up to 0.025 mm. Corrosion products on the surface must also be cleaned to ensure a proper test. The wet particle agent can be applied to the surface either by spraying or flowing. When the suspension is applied to the surface, the material must be magnetized. The duration between the application of suspension and magnetization is vital for further indication. Hence magnetization is generated whereupon the wet particle agent is covered on the surface. The clusters of the wet particles are examined by the experts to detect the near-surface defects of the ferromagnetic material.
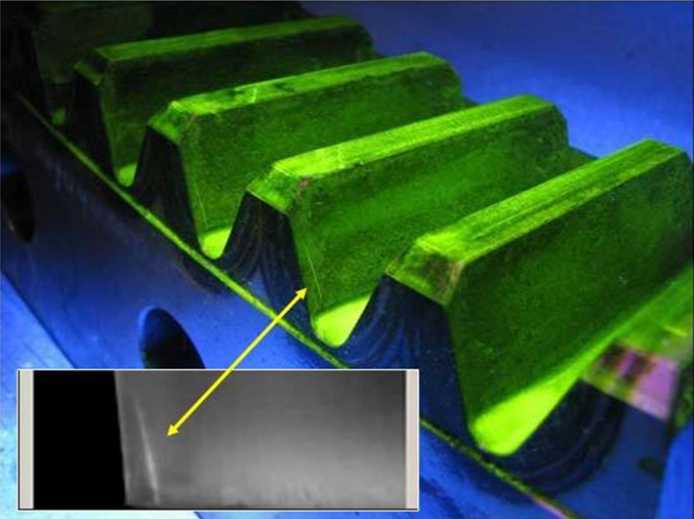
The pros and cons of the magnetic particle test may vary on the inspected material and the inspected failure. However, the magnetic particle method is widely used because of its simplicity. In addition to that, an inspection of only ferromagnetic materials may be considered as a limitation of the technique. Nonetheless, most of the engineering components are made of steel, which is a ferromagnetic material (except the austenitic stainless steel). Hence, a wide range of engineering components can be tested via utilizing magnetic particle inspection. The advantages and the disadvantages of the magnetic particle inspection are given below articles.
Advantages of the magnetic particle inspection;
- This method is highly sensitive to small defects. The detection of invisible cracks can be maintained by using the magnetic particle testing
- The surface preparation of the process is relatively easier. Thin dye layers or metallic coatings cannot inhibit the inspection
- The cost of the method is relatively low when compared with the advanced methods. Required material in the process is not expensive. Moreover, the equipment of the process are portable
- The shape of the particle clusters can give clues about the crack morphology. Hence the accumulation of the particles can be defined as the copies of cracks. One can determine the shape of a crack by examining the particle cluster
Disadvantages of the magnetic particle inspection;
- The method relies on magnetic flux leakage. If the magnetic flux leakage remains in the inspected body, magnetic particle testing cannot be done. Thus, only surface and near-surface defects can be inspected
- Only the ferromagnetic materials are susceptible to the magnetic particle examination
- The inspection area on the surface is relatively low when compared with other NDT techniques
- Nonporous material is mostly suitable for the magnetic inspection
For further information please read: Non-Destructive Test Methods
References
- Jiles, D. C. (1990). Review of magnetic methods for non-destructive evaluation (Part 2). NDT International, 23(2), 83–92. doi:10.1016/0308-9126(90)91892-w
- Eisenmann, D. J., Enyart, D., Lo, C., & Brasche, L. (2014). Review of progress in magnetic particle inspection. doi:10.1063/1.4865001
- Zolfaghari, A., Zolfaghari, A., & Kolahan, F. (2018). Reliability and sensitivity of magnetic particle non-destructive testing in detecting the surface cracks of welded components. Non-destructive Testing and Evaluation, 33(3), 290–300. doi:10.1080/10589759.2018.1428322
- Cawley, P. (2001). Non-destructive testing—current capabilities and future directions. Proceedings of the Institution of Mechanical Engineers, Part L: Journal of Materials: Design and Applications, 215(4), 213–223. doi:10.1177/146442070121500403
- (2021). Retrieved 10 Jan 2021, from https://www.qualitymag.com/articles/92792-key-elements-of-magnetic-particle-testing
- Ashok Reddy, K. (2017). Non-Destructive Testing, Evaluation Of Stainless Steel Materials. Materials Today: Proceedings, 4(8), 7302–7312. doi:10.1016/j.matpr.2017.07.060

